Creating a New Assignment in the KWL Hub
https://support.thekwlhub.com/en/articles/223-create-a-new-assignment
There are two ways of creating assignments: from the "Assignments" section and from the Interactive Content:
Creating Assignments from the "Assignments" Section
1. Click on "Assignments" on the left-hand side menu.
2. Click on "Create Assignment."
3. Click on "+Create New Assignment" to add a new assignment.

You will be redirected to the Create Assignment page.
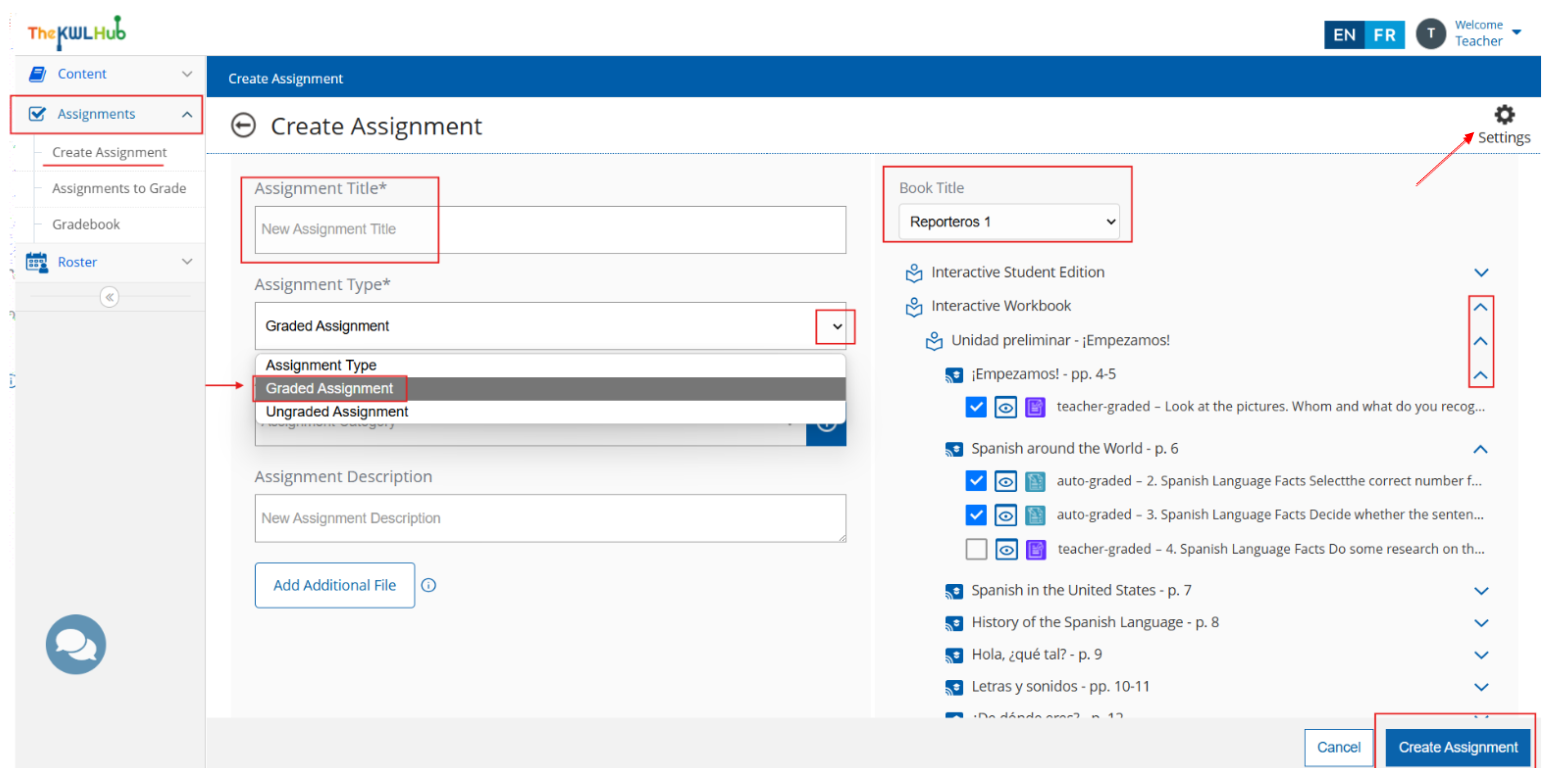
4. Enter an Assignment Title.
5. Choose an Assignment Type from the drop-down menu (Graded Assignment or Ungraded Assignment).
❗Note: Ungraded assignments are intended for practice, and their completion cannot be tracked. No grades or records will be stored in the gradebook for ungraded assignments.
6. You can also create an Assignment Category, which will help you organize and filter assignments in the future. By default, no categories are created, but you will be able to select from those you create in the drop-down menu.
ℹ️ Keep learning: Click here to see a complete guide on how to 🏷️ create categories.
7. The Assignment Description field is optional.
8. Select a Book Title to view and choose activities for the assignment.
9. To add multiple attempts and other features, click on the "⚙️" gear icon in the upper right-hand corner for Assignment Settings.
ℹ️ Keep learning: Please click here for a complete guide on ⚙️ Assignment Settings.
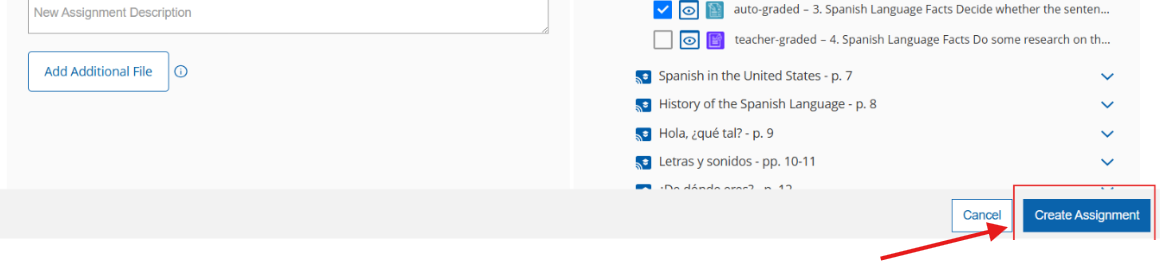
10. To attach optional file(s) from your computer to the assignment, click "Add additional file." You can add up to 5 files with a maximum size of 50 MB per file.
11. Once the Book Title is selected, all its sections will appear at the bottom. By clicking the arrows on the right (˄ ˅), all assignable activities will be displayed. The unit and lesson names are shown on the left
☑ To select an activity, check the checkbox on the left.
By clicking the arrows on the right (˄ ˅) of each chapter title, you can view the full list of activities.

Use the "👁" eye icon to preview an activity.

❗ Note: Activities can be either auto-graded or teacher-graded. This information is displayed on the left of each activity.

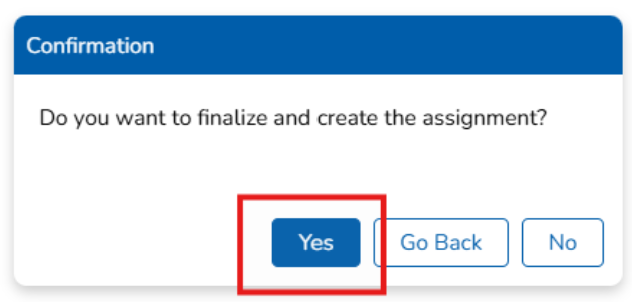
12. Click "Create Assignment" to save the assignment.
❗ Note: Creating an assignment does not automatically assign it to your classes. You will need to assign the assignment to your Student(s), Class(es), or Group(s).
ℹ️ Keep learning: Click here to see a complete guide on how to assign assignments.
Creating Assignments from the Interactive Content
1. Open the interactive workbook or textbook and navigate to the activity you would like to assign.
2. Click on "Create New Assignment."
3. Choose an Assignment Type (Graded Assignment or Ungraded Assignment).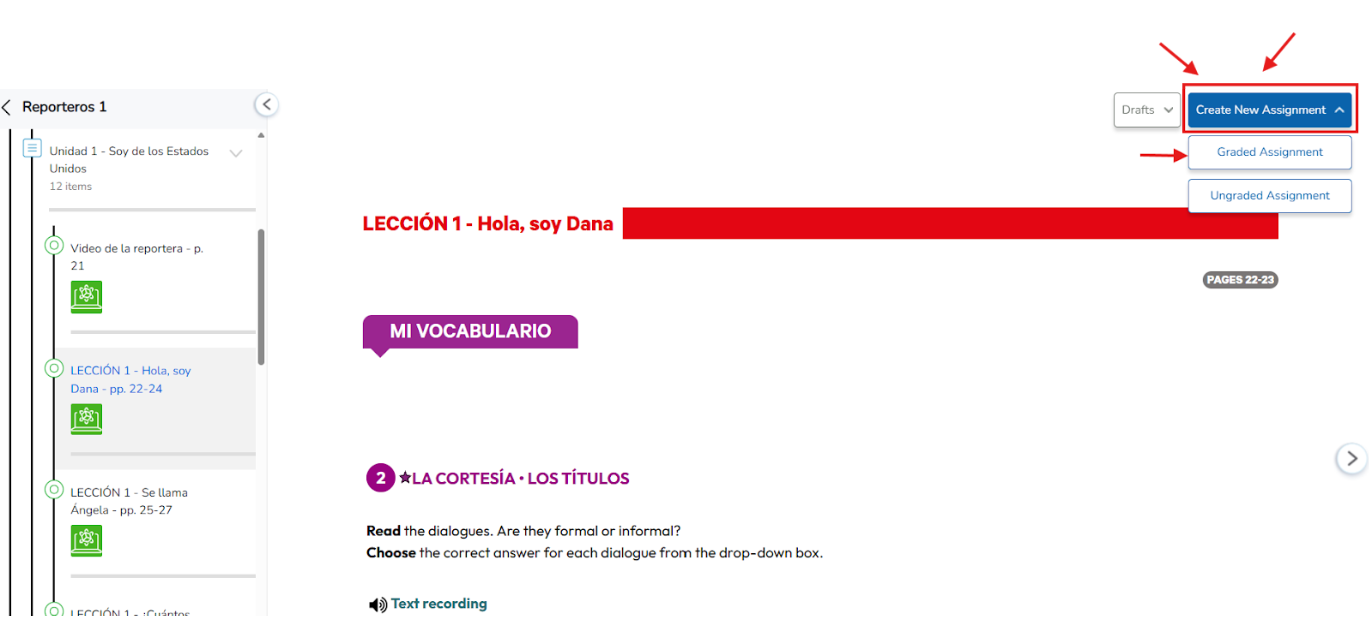
❗ Note: Ungraded assignments are intended for practice, and their completion cannot be tracked. No grades or records will be stored in the gradebook for ungraded assignments.

4. Enter an Assignment Title.
5. You can also create an Assignment Category, which will help you organize and filter assignments in the future. By default, no categories are created, but you will be able to select from those you create in the drop-down menu.
ℹ️ Keep learning: Click here to see a complete guide on how to 🏷️ create categories.
6. The Assignment Description field is optional.
7. To add multiple attempts and other features, click on the "⚙️" gear icon in the upper right-hand corner for Assignment Settings.
ℹ️ Keep learning: Please click here for a complete guide on ⚙️ Assignment Settings.
8. To attach optional file(s) from your computer to the assignment, click "Add additional file." You can add up to 5 files with a maximum size of 50 MB per file.
9. The Book Title can’t be changed, as it corresponds to the interactive content from which the assignment is being created.
10. ☑ The selected activities (indicated by the checkbox on the right) correspond to those displayed in the interactive book.
You can also unselect an activity to exclude it from the assignment. To add activities from other content areas, expand the desired resource and select the appropriate activities as needed.
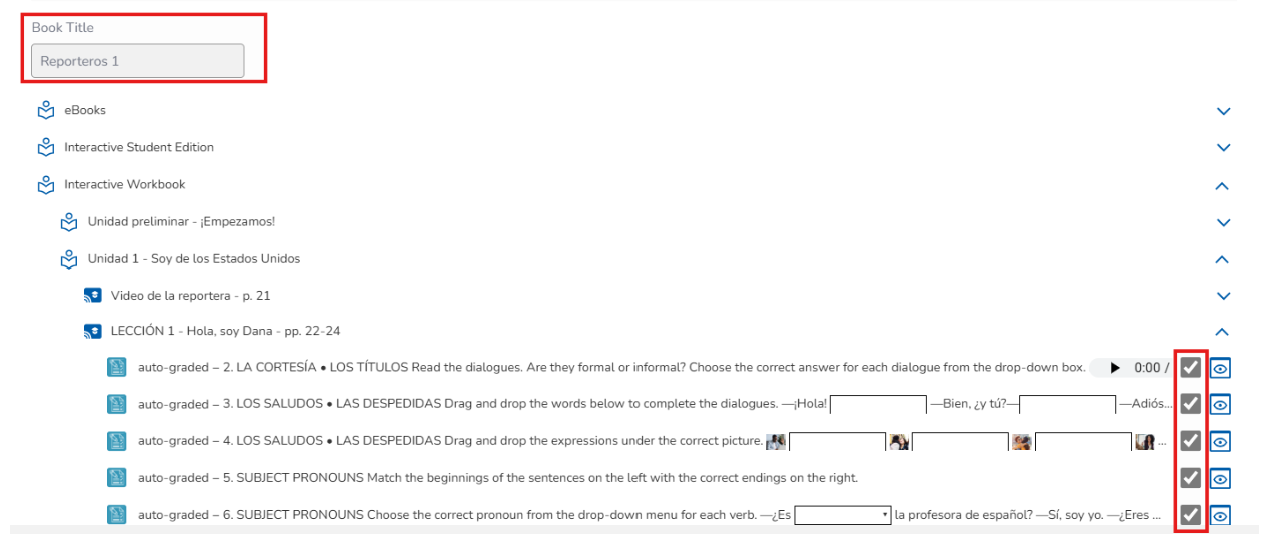
11. Use the "👁" eye icon to preview an activity.

❗ Note: Activities can be either auto-graded or teacher-graded. This information is displayed on the left of each activity.
12. You can click "Save as Draft" or "Create Assignment."

13.A. If you click on "Create Assignment" you will be able to assign the assignment.
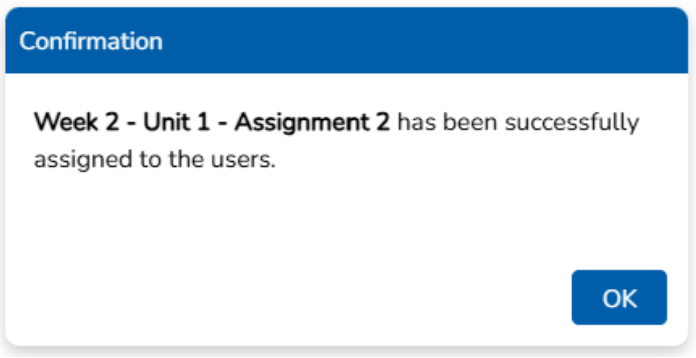
14.A. If you click "Yes, Assign" you will be able to assign the assignment to the class/es needed.
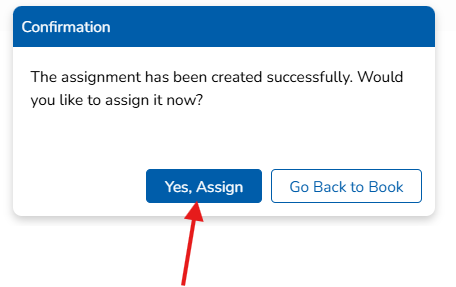

You will receive a confirmation message and you will be able to keep viewing the content.
14.B. If you click "Save as Draft," the assignment will be saved as a draft and can be edited later.
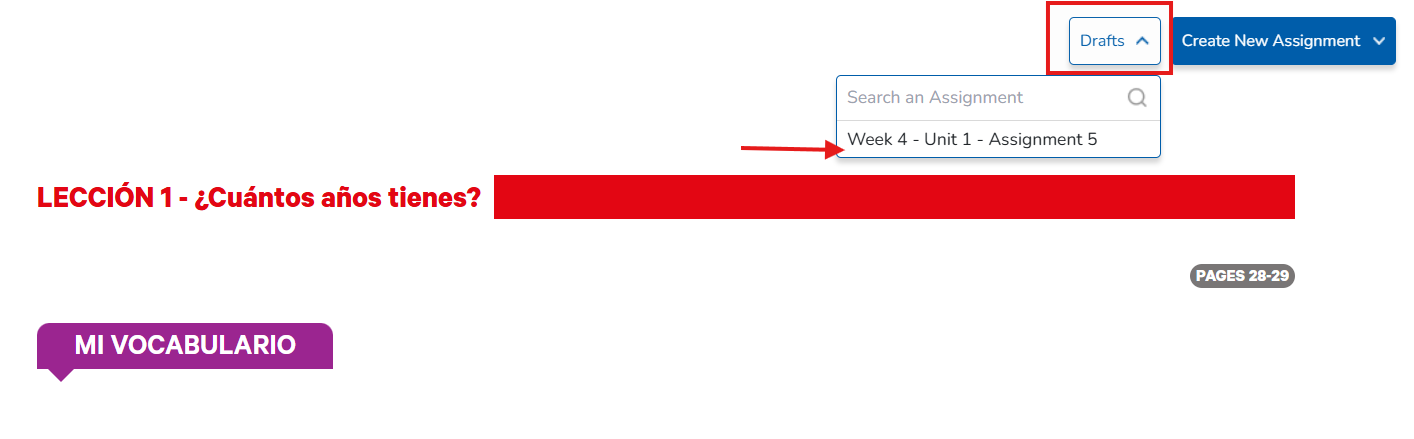
❗ Note: The drafts will be removed upon logging out of the platform. They are only accessible during the session.
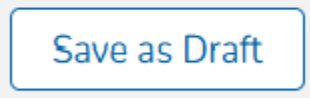
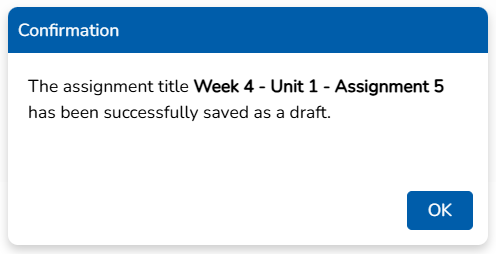
💡 Tip: You can access the draft by clicking on "Drafts" in the interactive book and continue editing it.
Need help? ![]()
Remember, you can contact us this support form. We are here to help!
Related Articles
Assign/Unassign an Assignment - The KWL Hub
https://support.thekwlhub.com/en/articles/225-assign-unassign-an-assignment Assign an Assignment Once an assignment has been created, the teacher needs to assign it to their Class(es), Student(s), or Group(s). ❗ Note: If the assignments are not ...Assignment Settings
https://support.thekwlhub.com/en/articles/189-assignment-settings You can set the settings of an assignment when creating or editing an assignment by following the next steps. ❗Note: Once you save the settings for one assignment, the same settings ...Teacher Guide: The KWL Hub and Canvas
Accessing the KWL Hub via Canvas Creating assignments with Canvas (Deep Linking) Importing Grades into Canvas Accessing the KWL Hub via Canvas 1. In Course Navigation, navigate to the Assignments tab. 2. Click on the assignment title "KWL Hub" or ...Teacher Guide: Accessing The KWL Hub via Moodle
https://support.thekwlhub.com/en/articles/173-how-to-access-the-kwl-hub-via-moodle Enabling the KWL Hub app in your course 1. Log into Moodle with your Teacher user credentials. Navigate to the course in which you would like to use the KWL Hub ...Creating an account with a Book Access Code (Teachers)
https://support.thekwlhub.com/en/articles/4-creating-an-account-with-a-book-access-code-teachers To create an account with a Book Access Code, visit https://klettlp.com/register.htm and complete the required fields: Email address ⚠️ Note: Double ...