Teacher Guide: Accessing The KWL Hub via Google Classroom
Overview
This guide for teachers describes how to sync your classes between Google Classroom and The KWL Hub.
Prerequisites:
Guide
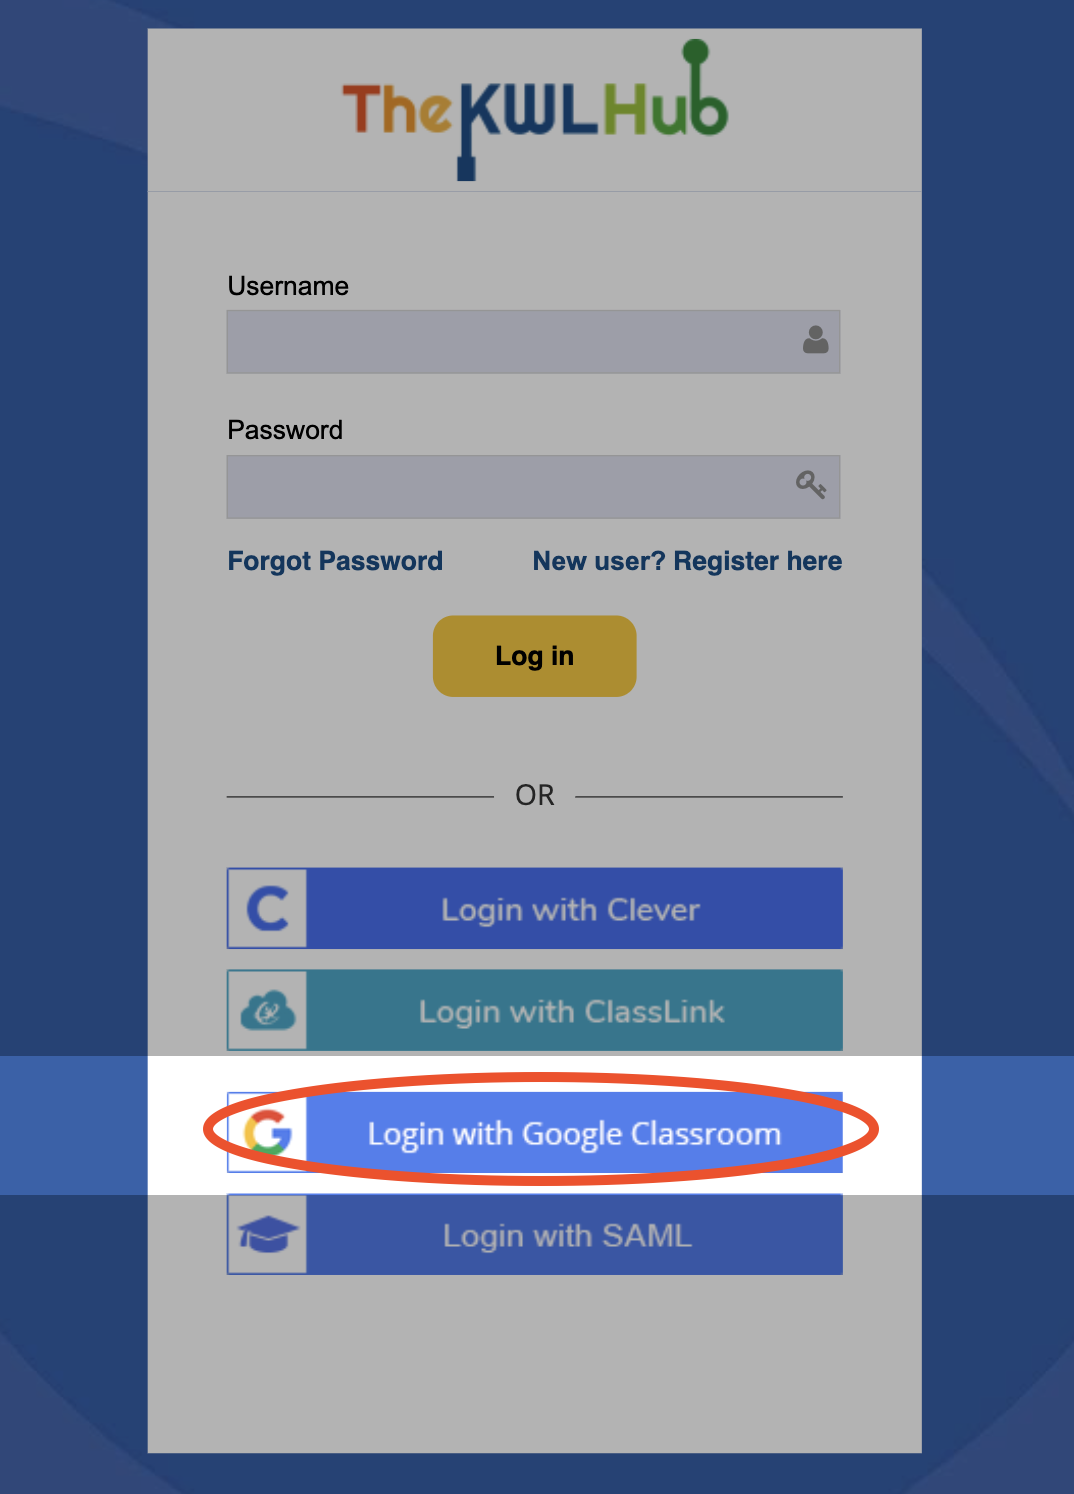
1. On The KWL Hub login page, click "Login via Google Classroom"
Navigate to The KWL Hub login page at https://klettlp.com/. Click on the "Login with Google Classroom" to log in. You may also be prompted to enter your Google credentials before proceeding.
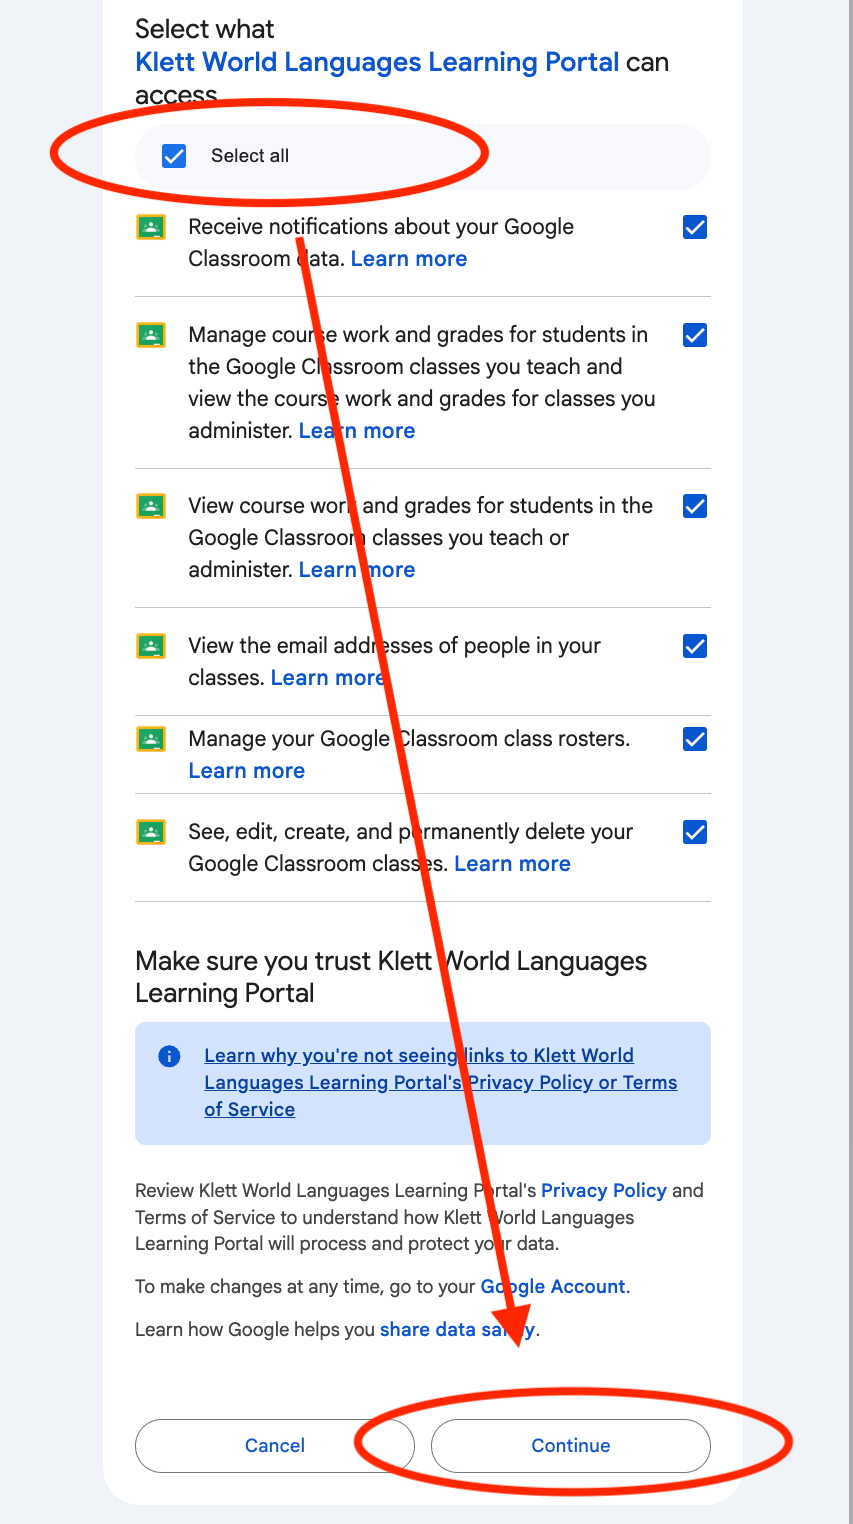
2. Agree to permissions
You will receive a consent pop-up when you log in for the first time. Review the permissions, then click "Select all" to provide consent. Click Continue.
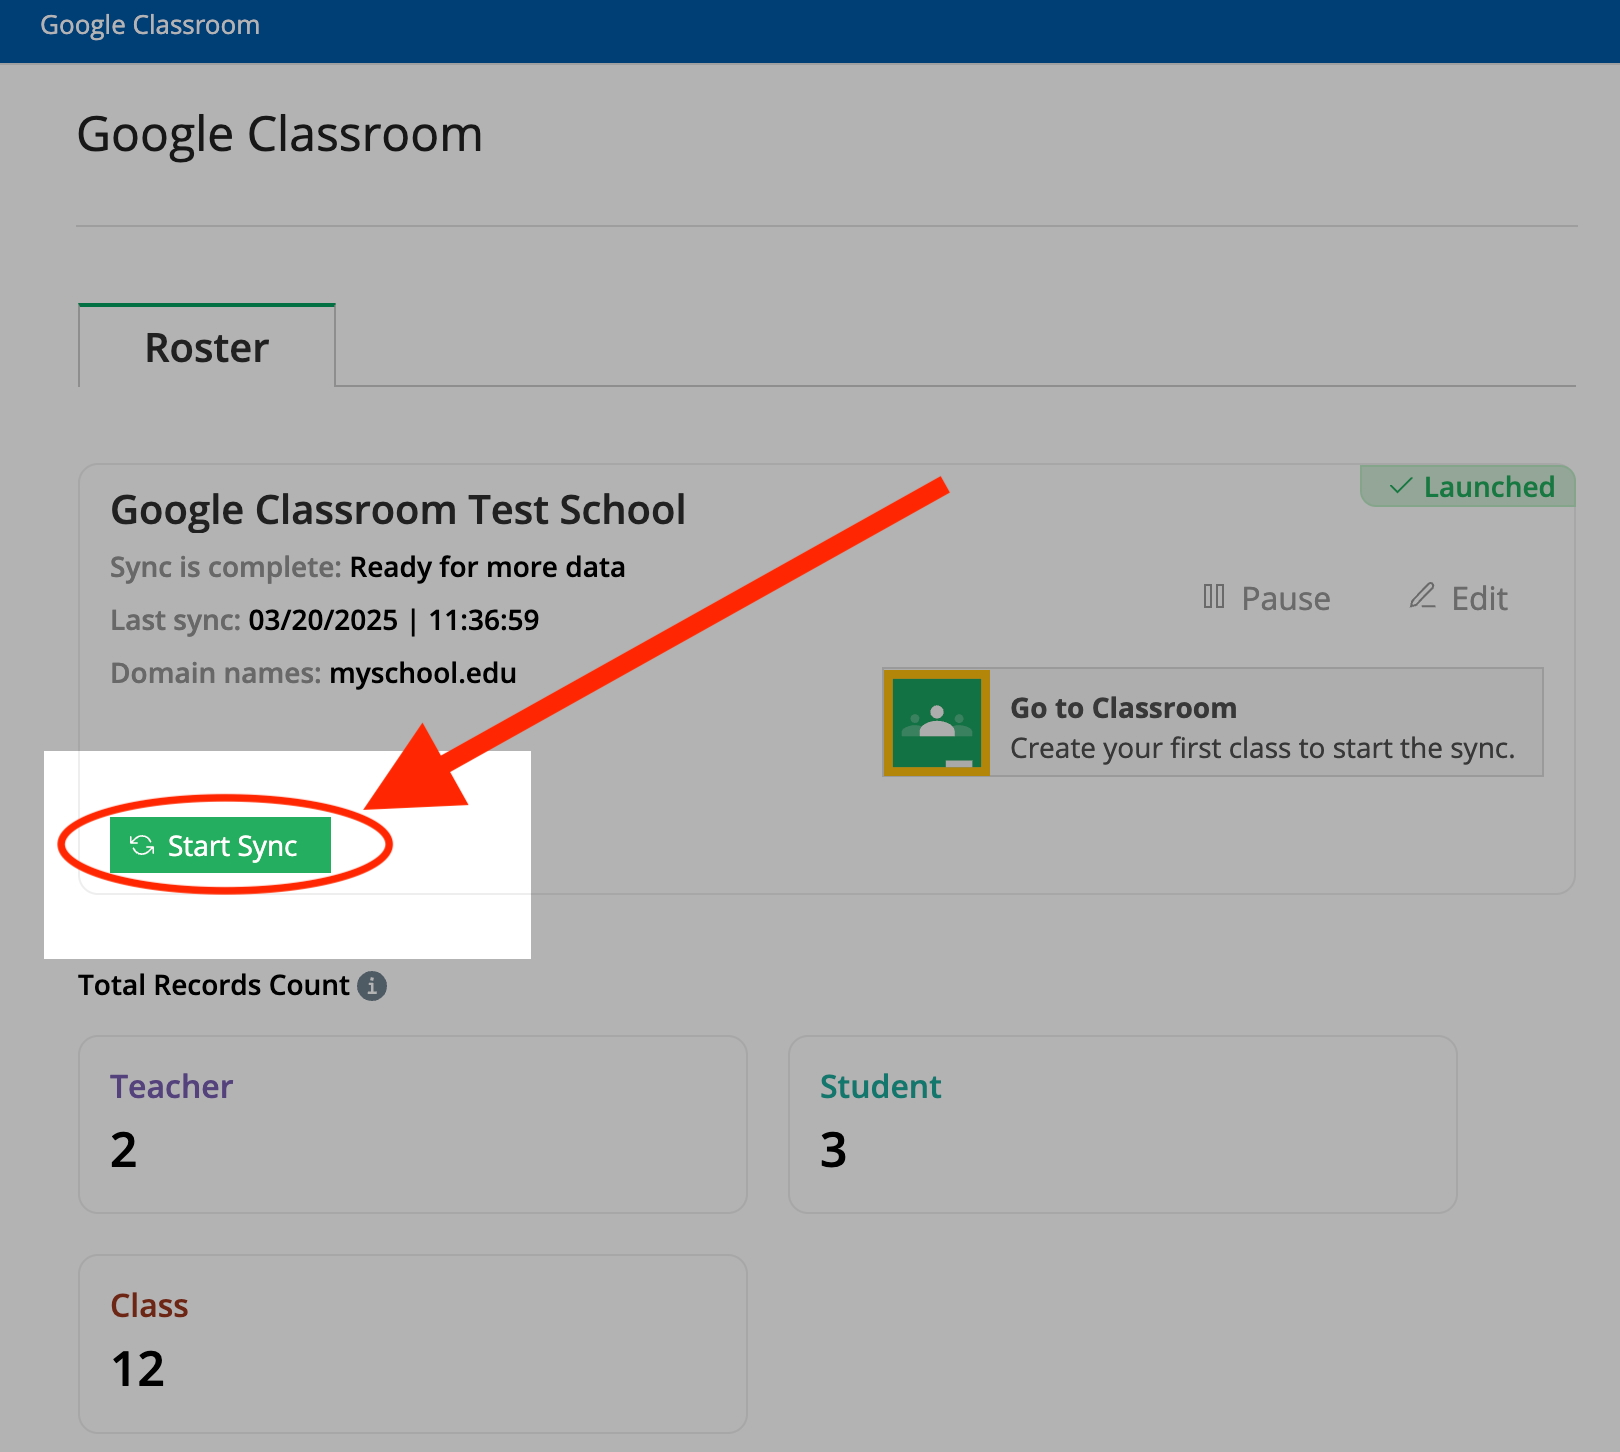
3. Click "Start Sync"
You will be directed to the Google Classroom sync page. Click on the Green "Start Sync" button to begin the sync.
4. Select which classes to sync
You will be directed to a list of all of the Classes within your Google Classroom. Select your language classes you would like to sync.
5. Select sync preferences
On the same page, choose the appropriate options as indicated below:
- Sync only active records from source directory (recommended): We recommend checking this box, as it ensures that The KWL Hub will only sync your active classes. If it is not selected, both active and archived classes will be synced.
- Sync expiration date: You may either sync indefinitely, or if you prefer you can choose an expiration date. Your data will continue to sync automatically until that date.
6. Click "Proceed" and "Start Sync" to confirm
Click "Proceed" to move to the next step and review your settings. If you would like, you can also choose to subscribe to notifications about your sync status (recommended). Click "Start Sync" to proceed.

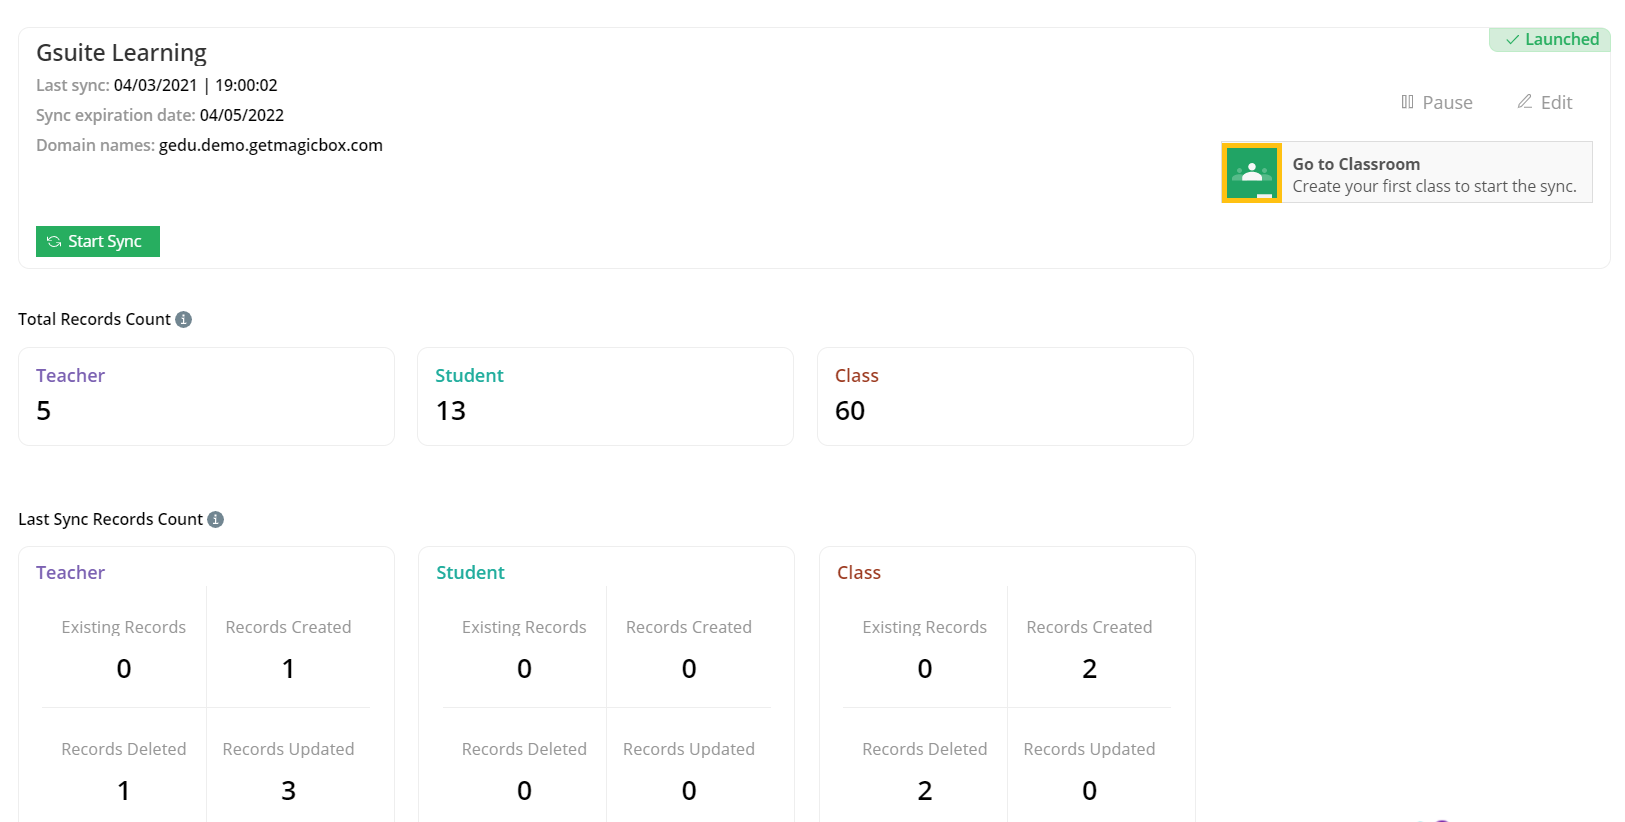
7. Wait for classes to sync
Once you click "Start Sync," you will be redirected to a summary page. This page will share the complete data of total teachers, students, classes and the last sync records count.
The initial sync of class rosters can take up to a few hours, based on the number of classes selected. You will receive an email notification when the process is completed. You can also see the sync status directly on the portal.
8. Check your rosters to verify
Once the initial sync of class rosters is complete, you should double-check need to verify that class numbers and student numbers are accurate. To do this, click on My Roster > Classes.
Next steps and resources
- If you do not see your books in your account, contact your admin. (Admins can assign books to teachers using our School Admin Licensing Guide).
- Check with your admin about how to enable book access for students.
Need help? ![]()
Remember, you can contact us this support form. We are here to help!
Related Articles
Teacher Guide: The KWL Hub and Canvas
Accessing the KWL Hub via Canvas Creating assignments with Canvas (Deep Linking) Importing Grades into Canvas Accessing the KWL Hub via Canvas 1. In Course Navigation, navigate to the Assignments tab. 2. Click on the assignment title "KWL Hub" or ...Teacher Guide: Accessing The KWL Hub via Moodle
https://support.thekwlhub.com/en/articles/173-how-to-access-the-kwl-hub-via-moodle Enabling the KWL Hub app in your course 1. Log into Moodle with your Teacher user credentials. Navigate to the course in which you would like to use the KWL Hub ...Teacher Guide: How to access The KWL Hub via Clever
https://support.thekwlhub.com/en/articles/29-how-to-access-the-kwl-hub-via-clever School/district users can log in with Clever SSO via their preferred entry point. This allows school users to easily log in to The KWL Hub platform without entering ...Assign/Unassign an Assignment - The KWL Hub
https://support.thekwlhub.com/en/articles/225-assign-unassign-an-assignment Assign an Assignment Once an assignment has been created, the teacher needs to assign it to their Class(es), Student(s), or Group(s). ❗ Note: If the assignments are not ...Creating a New Assignment in the KWL Hub
https://support.thekwlhub.com/en/articles/223-create-a-new-assignment There are two ways of creating assignments: from the "Assignments" section and from the Interactive Content: Creating Assignments from the "Assignments" Section Creating ...